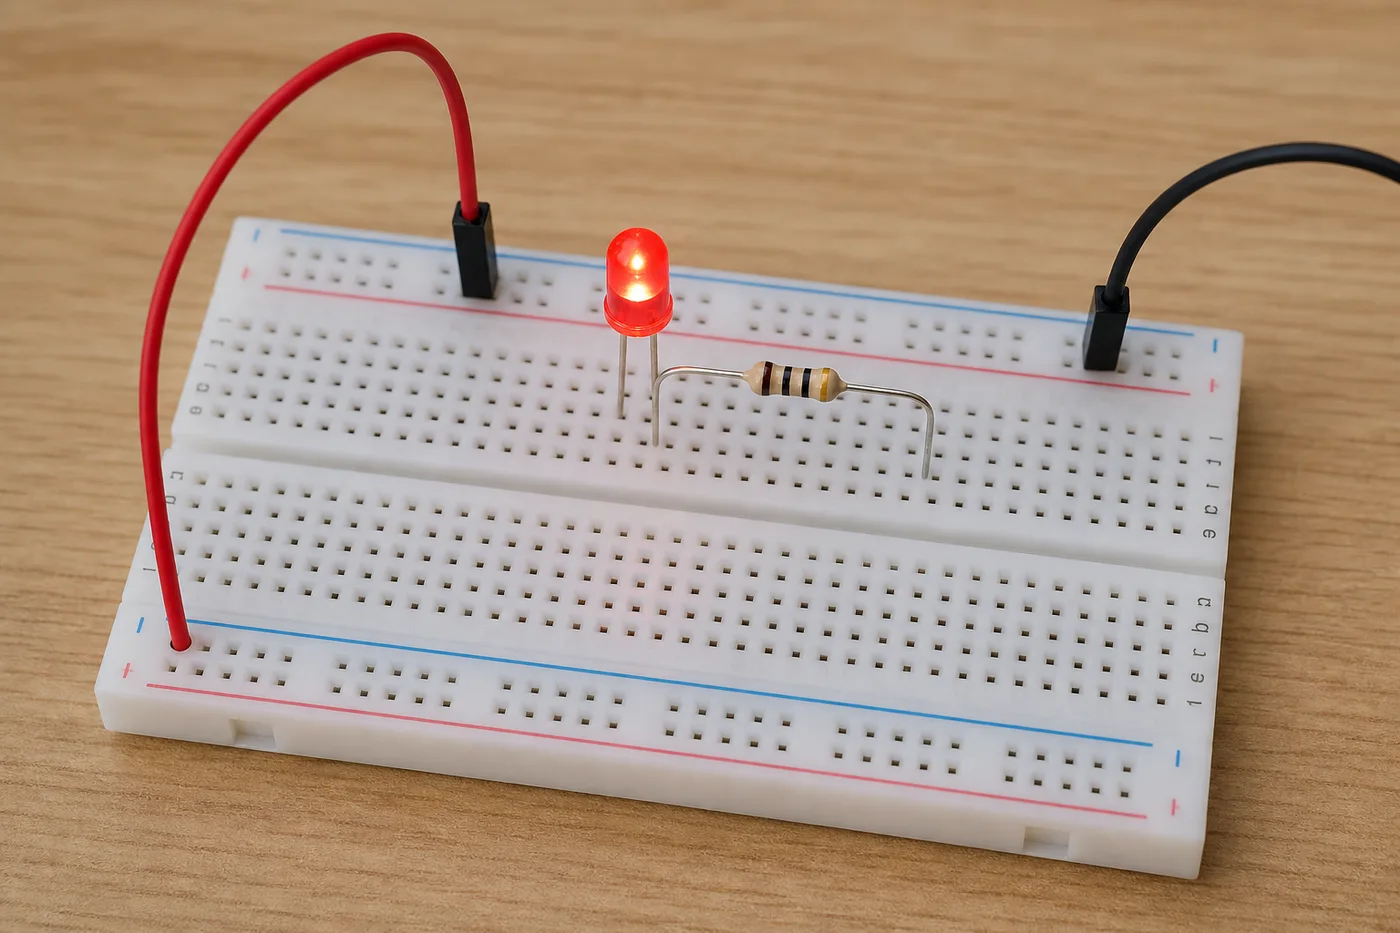
An LED circuit on a breadboard is the first real electronics win for kids. Power goes through a resistor into the LED’s long leg; the short leg returns to ground. If polarity or wiring is wrong, the LED stays dark — and that debugging is part of learning.
Components Required
- Breadboard
- LED (any colour)
- Resistor (commonly 220Ω–1kΩ)
- Jumper wires
- 5V supply (USB power bank/module as guided by mentor)
Step-by-Step Wiring
- Connect 5V and GND to the breadboard power rails
- Place the resistor from the positive rail to an empty column
- Insert the LED long leg into that same column
- Insert the LED short leg into a different column tied to GND
- Power on and confirm the LED lights
Common Mistakes
- Skipping the resistor
- Reversing LED polarity
- Putting both LED legs in one column
- Forgetting to power the rails
Next in this series: buzzers, motors, relays, then robot builds. Continue with GeekashramJr’s breadboard and robotics path after a local-currency 60-minute session (adjusted on enrolment).